Showing posts with label DIY. Show all posts

Monday, March 21, 2011

It's the Perfect Storm - Painting the Dining Room - Part 3

If you read previous posts, you know we started the Dining Room remodel a year ago!  Here are some before pictures....

The color on the walls is construction color 'peanut shell'...I got a small sample of the paint color I wanted and painted it on the wall to see if we would like it.


Before pics... 

more before... 

and more before... 

Here's my husband starting to paint.  Paint color is from Lowes.  Valspar - Perfect Storm. 

I wanted a 'peacock blue'..this is as close as I could find.  Not navy, not teal...kind of in between. 

love, love, love it! 

Since our ceiling is so high in here (12 feet), the darker color works fine. 

This pic makes the blue look brighter than it is...the other pics look more 'true to color'. 

A coat of paint = Pricele$$

Sunday, March 20, 2011

How to Cover Nail Holes - Dining Room - Part 2

So we are finishing up the Dining Room this week and we finally got the beadboard up (installation coming in a later post) but before we could paint, the nail holes needed to be covered.  Here's how to do that:

First, use a 'punch' and hammer and 'sink' the nails below the surface you are working on.  You don't want the nails flush or above the wood.

Use spackle to fill the holes.  On flat surfaces, you can use a putty knife.  On rounded surfaces, use your fingers.

I like this one because it starts out pink and turns white when it's dry.

Fill the hole.  On a rounded surface like this one pictured..overfill the hole - you will sand down when dry.  On a smooth surface, use a putty knife and fill, then scrape away excess to be even with the wood surface (less sanding that way).
See how it has a pink tint - still wet.

When it drys, it turns white.

Use a sanding block or sandpaper to sand the excess off...you want the 'filler' to be even with the wood surface.

And there you go.  Can't see the holes anymore and when it gets painted, you will not be able to tell where the hole was.

Doing something for yourself to improve your home = Pricele$$


I party each week with the following ladies...go check out their blogs and PARTY ON!!!

UndertheTableandDreamingPhotobucket Keeping It SimpleSumo's Sweet StuffPhotobucketThe DIY Show Off
Anything RelatedPhotobucket http://linda-coastalcharm.blogspot.com/LINKPARTYBUTTON

http://www.thegypsyscorner.com/
http://todayscreativeblog.net/”BCDMake it Yours @ My Backyard Eden
Transformation Thursday

Beyond The Picket Fence

Saturday, March 19, 2011

DETOUR - The Dining Room - Part 1

Ok, so I had planned to make my Camera Bag this week to put my camera and it's niffty new Camera Strap in....but the Dining Room was calling to be completed, so the bag will have to wait for another day. :(

To 'set the stage', we started the Dining Room makeover LAST Spring Break...yes, a-year-ago Spring Break!  I've always wanted Beadboard 2/3 up the walls and my husband found like 10 sheets of beadboard on craigslist for $40 last year, so I was going to get my beadboard in the dining room....little did I know this project would become a BIG headache for us!

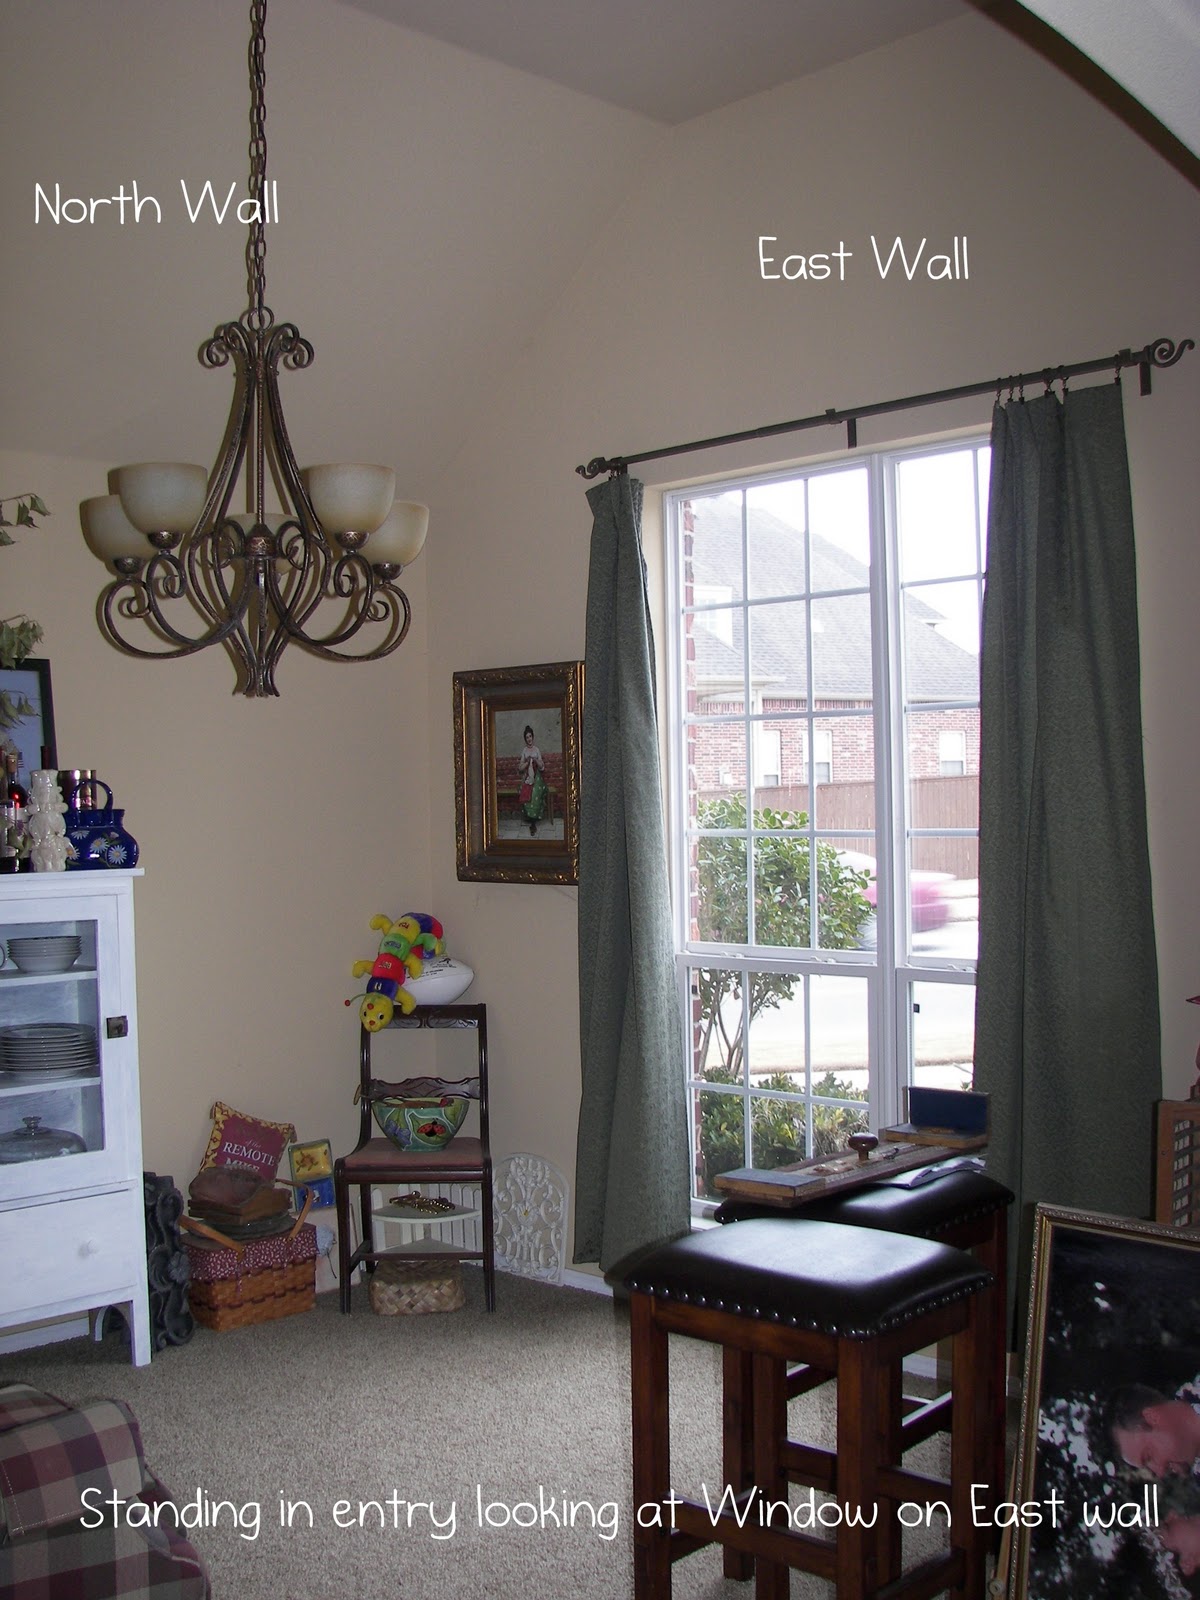
Here is our dining room BEFORE:


That's a 12 foot ceiling in there...love it!  We decided we wanted a room that we could play games/cards with our friends, so this room will be a dining/game room.  The chandelier had to go...if we are going to spend hours in that room, we needed a ceiling fan...and here's the one we chose:


You are getting a sneak peak at the color we painted...it is not this bright of a blue...it's more of a peacock blue...I'll show you better pics of the color later.

We also splurged and bought a custom shutter for the window. 


The window is 7 feet tall and 6 feet wide.  This became a nightmare for us!  We do everything ourselves.  We usually install everything ourselves.  We got a great discount on the shutter because of a sale, so we ended up letting the place we bought the shutter from install...big mistake!  After 2 different installers, 2 differently measured shutters, and one damaged shutter, and a year later....we still are not completely satisfied...but so 'done' with it that we are living with the shutter that is there!

Ok, so there's Part 1 of the Dining Room remodel.  More to come this week...
Installation of beadboard
Painting ceiling and beadboard
Tips that help make the job easier

"Livin' the Dream" even when it makes you CRAZY = Pricele$$


I party each week with the following ladies....go check out their blogs and PARTY ON!!!
UndertheTableandDreamingPhotobucket Keeping It SimpleSumo's Sweet StuffPhotobucketThe DIY Show OffAnything RelatedPhotobucket http://linda-coastalcharm.blogspot.com/LINKPARTYBUTTON

http://www.thegypsyscorner.com/
http://todayscreativeblog.net/”BCDMake it Yours @ My Backyard Eden
Transformation Thursday

Beyond The Picket Fence