
I LOVE homemade 'goodies'.
LOVE, LOVE, LOVE them!!!
If someone takes the time to bake something for me...I'm in heaven! Plus, I love 'goodies'!
I made these last year for my coworkers and my husband's coworkers. I was so thrilled with how they turned out and I plan to make goodies this year, but it hasn't happened yet and I wanted to share these with you now.

First, I made 'homemade goodies'. These are not hard, just time consuming. I did the following:
Milk/White Chocolate dipped pretzels
(melt chocolate or vanilla almond bark, dip, decorate with sprinkles)
Milk/White Chocolate dipped marshmallows
(melt chocolate or vanilla almond bark, dip, decorate with sprinkles)

I got the containers from Target - at their $1 spot BUT they were marked down 75% - and they came 2 in a set....so each container was 12 1/2 cents! These were originally 'plant containers'...so look for things you can repurpose. They had orange and green...now this is not my fav color of green, but I knew they would be wrapped in cello paper so I wasn't too worried about the color. I also knew when I bought them that I wanted to make something for Christmas, so I bought all green.
I know I have pictures of all my 'goodies' lined up on the counter...but I can not for the life of me find them! sorry :-(
Anywho, I cleaned out the containers and lined them with wax paper. I put the marshmallows on the bottom to 'take up room'. Each container only got 1/2 pieces of each type of goodie (except the pretzels and the peppermint bark, which they were my 'filler items')...they are not big containers either...remember it's the thought that counts and you want your 'thought' to have a 'big impact'...so it can still be small and have a 'big impact'. :-)
After the marshmallows, I layered all the goodies, lining each layer with wax paper so nothing would stick to something else. When I got to the top, I used the pretzels and peppermint bark as fillers to fill the 'holes'.

I got snowflake cello paper and cut it into squares...I didn't measure, just pulled it out and cut where it would be a square.


Since I was by myself, I gathered up the cello paper and use a rubber band to hold it. Then I could tie the ribbon around the rubber band...didn't need an extra pair of hands! I got that ribbon at Sam's one year after Christmas...Sam's is a great place to get ribbon because there is 30 yards of ribbon on their spools and I think they are regularly priced at around $10. I got mine for like $2.50!!! for 30 yards!!!


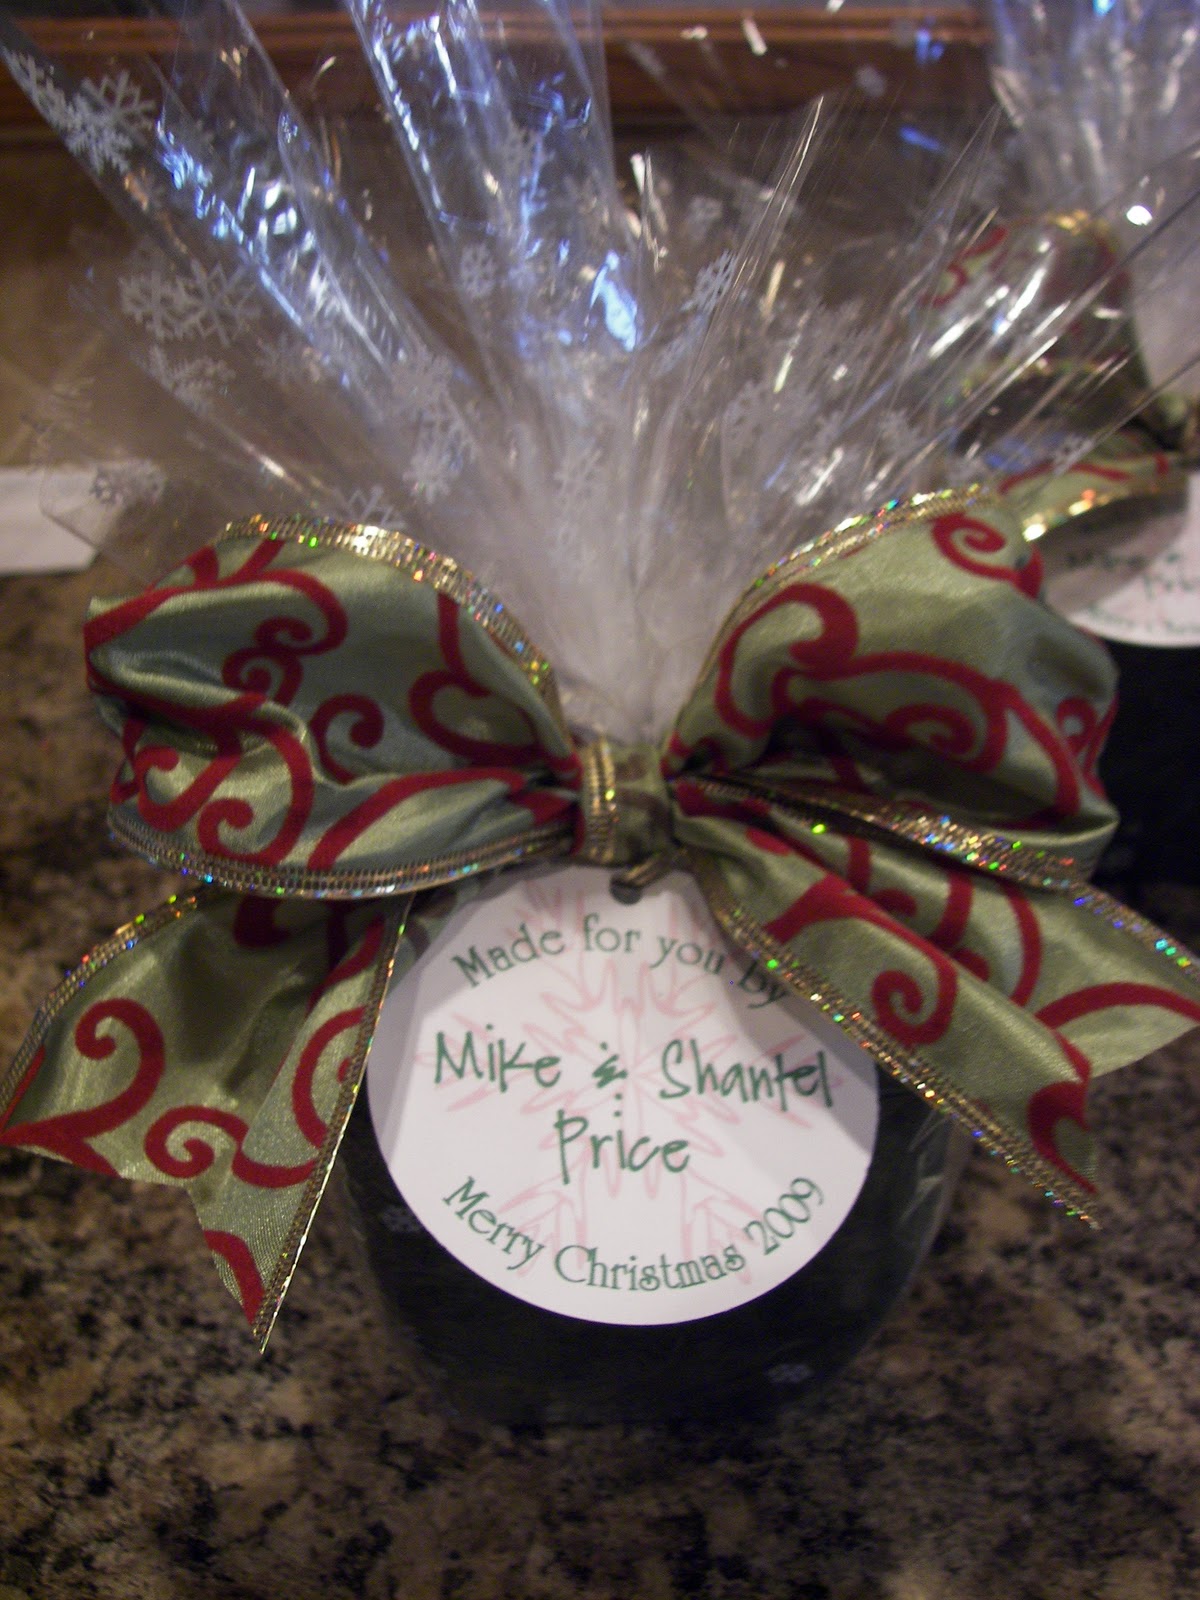
I made tags on the computer, cut them out and added them to the containers! TA-DA!!!


Each gift cost approx - $1.00
Giving gifts made with love that look awesome = Pricele$$


very cute results with simple good beginnings. Yum
ReplyDeleteAwesome! Doing this kind of stuff is the best part of the holidays!
ReplyDeleteI love the simplicity yet elegance of the project. Thanks for sharing it and breaking down the costs.
ReplyDeleteI love homemade goodies from food treats to crafty items. BEST gifts to me! Thanks for sharing and for stopping by my blog. :-)
ReplyDeleteYum, looks delicious! I want one. :)
ReplyDeleteVery cute! Love the idea.
ReplyDeleteGreat idea...I would love to receive a gift like this...so festive looking, too
ReplyDeletethose definetly do look delicious
ReplyDeleteI am a new follower of yours stop by my blog if you find time
Those looks great and those pretzels look yummy! I make the bark every year. Still haven't made it yet but that will be a project this weekend or next week.
ReplyDeleteThanks for linking up!
Yummy!
ReplyDeleteCome enter to win a free pair of sandals!
http://gigglesglitzandglam.blogspot.com/2010/12/sseko-giveaway.html
What a great idea... I'm back to Target to hit their $1 spot!
ReplyDeleteAnother friday's favorite for sure :-)
I love the way they look all lined up like that. You are so right about the re-purposing...it's a must! Thanks for linking up this post to Theme Party Thursday!
ReplyDelete-Jami
Awesome job . . . a great gift!
ReplyDeleteI am following you from Saturday Soiree . . . LOVE your blog . . . hope you get a chance to visit my blogs :-)
Have an awesome weekend . . . Gina
http://labelladiva.blogspot.com
http://ginasitaliankitchen.blogspot.com
. . . and many more!
OK, Shantel, you have to bring some to school for us to "sample"! Looks wonderful!
ReplyDeleteSo cute and thrifty too Love it!
ReplyDeleteI read that if you put a little double stick tape on the ribbon and then put into place that you can tie a bow without anyones help.
ReplyDeleteVery cute idea! I'm all about cheap and thoughtful!